This post may contain affiliate links. Please read our disclosure policy.
Easy Classic Butter Tarts are a traditional and national Canadian beloved dessert; and for all the best reasons! This butter tart recipe is made using individual sized flaky pie crusts filled with a buttery, sweet, caramelized filling. It’s not only simple, but delicious and tasty as well! Serve as a dessert or mid-day sweet snack.
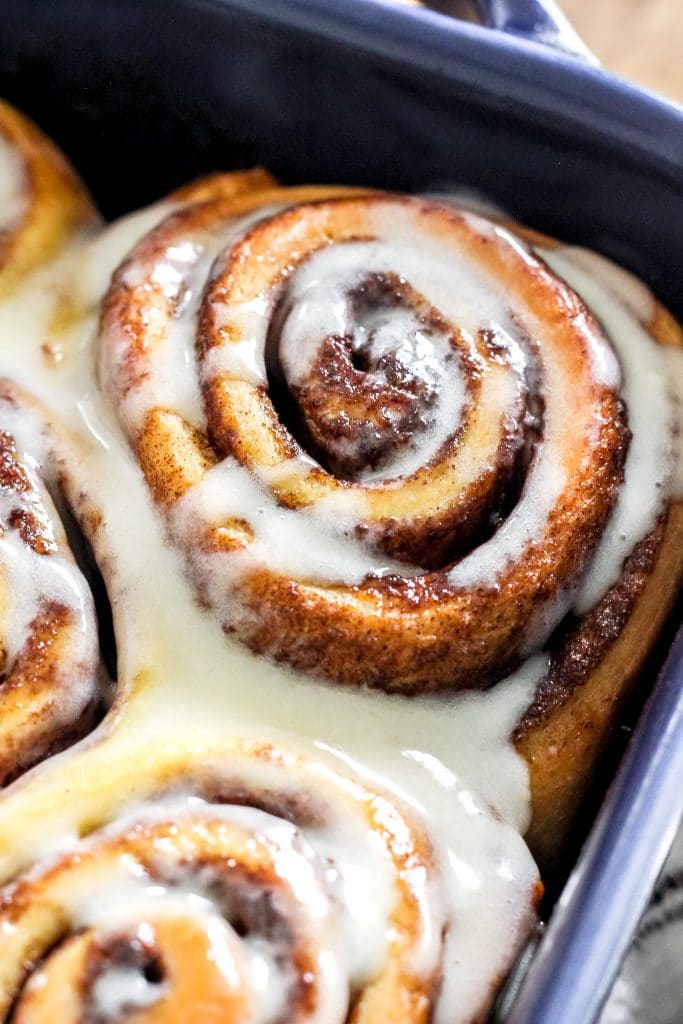
For more sweet treats, try my Easy White Chocolate Brownies with Chocolate Chips, my Soft Cinnamon Rolls (Easy Recipe), or my Easy Peach Crisp!

Big thank you to CornershopCA for sponsoring this blog post. As a avid online shopper, it gives me great pleasure to share Cornershop with you. They offer an on-demand grocery delivery service where you can browse local grocery stores, pharmacies, hardware stores etc. and have the items delivered to your doorstep in 60-90 minutes. Lastly, a big thanks to you, my readers for supporting me and supporting the brands who support The Seasoned Skillet. All thoughts & opinions are my own.

Use code CA_SOCIAL to get $15 off your first order with Cornershop!

Table of Contents
What is a Butter Tart?
A butter tart is a classic Canadian, small 2-bite sized pastry tart filled with a delicious semi-solid sugary, tasty syrup filling made using butter, brown sugar, and eggs!
How to Make Easy Classic Butter Tarts
If using pre-made tart shells, this is one of the fastest dessert recipes you can make!
- Prepare Filling – melt butter and let cool slightly. Then add brown sugar, golden corn syrup, egg, salt, vanilla and lemon juice; stir until well combined. If choosing to use add-ins, stir them in here.
- Fill Tart Shells – Pour the filling into the tart shells and bake for 16-17 minutes at 375°F or until the tart shells start to turn golden brown, and sugar caramelize.
- Let cool before serving and enjoy!


How to Store Butter Tarts
- Butter tarts should be stored in an airtight container and refrigerated for up to five days. If stored at room temperature, they will keep for up to 2 days. If storing in the fridge, you can indulge while cold or bring them to room temperature before serving.
- You can freeze butter tarts for up to 2 months. To do so, be sure to freeze in an airtight freezer container. When ready to eat, bring to room temp on the counter, then heat in oven at 350F for 5-10 minutes to re-crisp the pastry.


Grab the Grocery List (Screenshot The Recipe Ingredients Below)!
- Pie Pastry Recipe or 12 Pre-Made Tart Shells – I used Tenderflake Tart Shells
- Unsalted Butter
- Brown Sugar
- Golden Corn Syrup
- Egg
- Salt
- Pure Vanilla Extract
- Lemon Juice
- Chopped Pecans – optional
- Dried Fruit – optional
- Chocolate – optional

Easy Classic Butter Tart Tips & Notes
- If your preference is a more solid tart filling add an extra egg to thicken the filling.
- Fill tart pastry shells until three-fourths (3/4) full, if you fill to the brim it will overflow.
- The filling will expand and bubble in the oven, when cool it will settle and firm.
- The lemon juice offsets the sweetness without making the pastry taste sour!

More Must-Try Desserts & Treats
Cookies and Cream Cookies & How to Make Soft Cinnamon Rolls (Easy Recipe)

I’d greatly appreciate if you left a star ★ rating (located near the top of the recipe card below), as well as leave a comment if you found this blog post helpful!
Also, don’t forget to keep up with me on Facebook, Twitter, Instagram, and Pinterest!

Easy Classic Butter Tarts
Ingredients
- 12 Pre-Made Tart Shells
- 1/3 cup Unsalted Butter, melted
- 1 cup Brown Sugar
- 1/3 cup Golden Corn Syrup
- 1 Egg, room temperature, whisked
- 1/4 tsp Salt
- 1 tsp Pure Vanilla Extract
- 1 tsp Lemon Juice
Optional Add-Ins
- Chopped Pecans
- Dried Fruit
- Chocolate
Instructions
- Prepare tart shells according to product packaging.
- Melt butter and let cool slightly. Then add brown sugar, golden corn syrup, egg, salt, vanilla and lemon juice; stir until well combined. If choosing to use add-ins, stir them in here.
- Pour the filling (about 3/4 full) into prepared tart shells and bake for 16-17 minutes at 375°F or until the tart shells start to turn golden brown, and sugar caramelize. Let cool before serving and enjoy!
Notes
Nutrition


Delicious and easy to make.
Thank you Diana. I’m glad you like it!